Maven Filters - A Long Term Review
The verdict is clear - a seamless addition to my kit that has become an essential everyday tool
If you would like to support more articles like these, please consider making your filter purchases with the following link - click here to shop at Maven Filters
Disclosure: the 77mm CPL filter set was provided free of charge from Maven Filters in exchange for my long term thoughts on it, and they have not had access to this review before publication. All other filters and adapters discussed were purchased directly by me outside of my agreement with Maven Filters in order to more broadly test their product lineup. This article contains affiliate links for these filters and other accessories.
There comes a time in every photographer’s life when they sit at their desk, gazing upon the scattered, heterogeneous collection of lens filters amassed over so many years of piecemeal purchasing, and think to themself: “There has to be a better way.”
As I was in the midst of my own personal filter crisis, I reached out to the owner of Maven Filters, Michael Andrew (also known online as Michael the Maven) to talk through the design ethos of his products. Having done more research than I’d like to admit across all of the major brands and options, the appeal of moving to a magnetic filter system was…attractive. Will that be the last magnet joke of this review? Unlikely.
What I had built over the years was a collection of singular, matte black, high grade filters, each requiring their own cases, some that worked with hoods, others that didn’t, some that played nice when stacked together, and many others that didn’t. Michael explained to me that his intention with Maven Filters was to provide photographers with a single brand of magnetic, stackable filters that not only share the same design language between functions, but are also designed to be high-vis and easily identifiable when you’re rooting through your bag.
Michael told me he had compiled a list of every pain point they’d heard from filter users and attempted to address them all:
Color-coding by function
Aluminum frames instead of brass for weight savings
Magnets instead of threads for instant swapping
Hydrophobic coatings for easy cleaning in the field
High-grade glass that doesn’t degrade image sharpness or shift colors
0.7mm thick glass, thinner than the industry average, to save even more weight
Completely eliminate the need to carry filter wrenches in the field
Magnetic adapters in two strengths - a lighter magnet for those with dexterity/hand strength and a newer extra strength adapter with a 2.5x stronger magnet for those that desire more security
The longer we spoke, the more I realized that Michael and I broadly share the same views on design and functionality. Both are important for different reasons, and a product that compromises neither tends to be the better option for it. I asked if he’d be willing to send me one of Maven’s starter sets for review, and he not only obliged, but told me to only publish it after I felt completely comfortable doing so. Here we are, the better part of a year later, and I’m ready to share my comprehensive thoughts about Maven’s ecosystem with you.
What Maven Filters sent me
77mm Circular Polarizer Set
In my opinion, this kit should be named The Essential set, because its utility extends far beyond the included CPL. You get:
Circular Polarizer (CPL)
3 Stop Neutral Density (ND) - “Red”
6 Stop Neutral Density (ND) - “Purple”
10 Stop Neutral Density (ND) - “Sunshining”
Splash Guard (UV)
1x regular strength magnetic adapter ring
1x magnetic front lens cap
Plastic locking travel case
$604 USD MSRP, currently on sale for $479 - click here to shop at Maven Filters
Maven also sent a few other things over (click each to see a full description):
77mm Linear Polarizer
1x extra strength magnetic adapter ring
1x Front Cap 2.0
All told, this was a perfect intro to their version of the basic filter kit that every photographer should own in some form or fashion, especially landscape and daytime shooters like myself. I appreciated Maven’s generosity with this setup and for giving me a comprehensive feel for what they offer at the full kit level.
What I bought on my own
To more fully flesh out my testing, I purchased a number of extra filters and accessories so that I could utilize more glass for my experimentations. I have quite a few lenses that utilize 52mm and 58mm filter threads, with all of the 58mm options able to accomodate 52mm filters with a step up ring with no vignetting.
What I ended up buying is what I would call a “full stack”. I’d like to see Maven offer this as a bundle with a small discount in the future, as it would provide users a one-click option for each lens size.
52mm CPL
52mm Extra Strength Magnetic Adapter
52mm Magnetic Front Cap
52mm Magnetic Back Cap
All told, this 52mm “full stack” cost me $144 shipped at full MSRP.
I also picked up some 67mm to 77mm and 43mm to 52mm Step Up Adapters to allow my 2 sets to work on even more lenses.
The Details
Now that you know what I’ve been working with this year, let’s talk each element in detail. I’m going to break this into subsections by functionality, covering how I used it and how I felt about it over the long term. Note that I’m going to break up the provided CPL set into its constituent parts due to the fact that you can buy each on its own if you desire.
Magnetic Adapters
Maven’s adapters are the backbone of the system - they thread into your lens and then turn everything after them into a fully magnetic setup. Having tried both the regular and extra strength adapters, I have a very strong opinion: I would only recommend the regular strength adapter for anyone with finger dexterity or mobility issues. With the regular strength adapter, I have had filters unexpectedly pop off while traveling if they catch at the right angle, but this has never once happened with the extra strength adapters. I have been lucky that the filters landed in a way that didn’t damage them, but had I been scrambling through the desert chasing a sunset, odds are good that the filter’s glass would have ended up scratched or worse.
Another consideration: if you plan on stacking multiple filters, the stronger the adapter’s magnets, the better.
I’m not saying to do this (seriously, don’t!), but I can hold an 800g lens by the magnetically attached CPL when using the extra strength adapter. Extremely impressive!
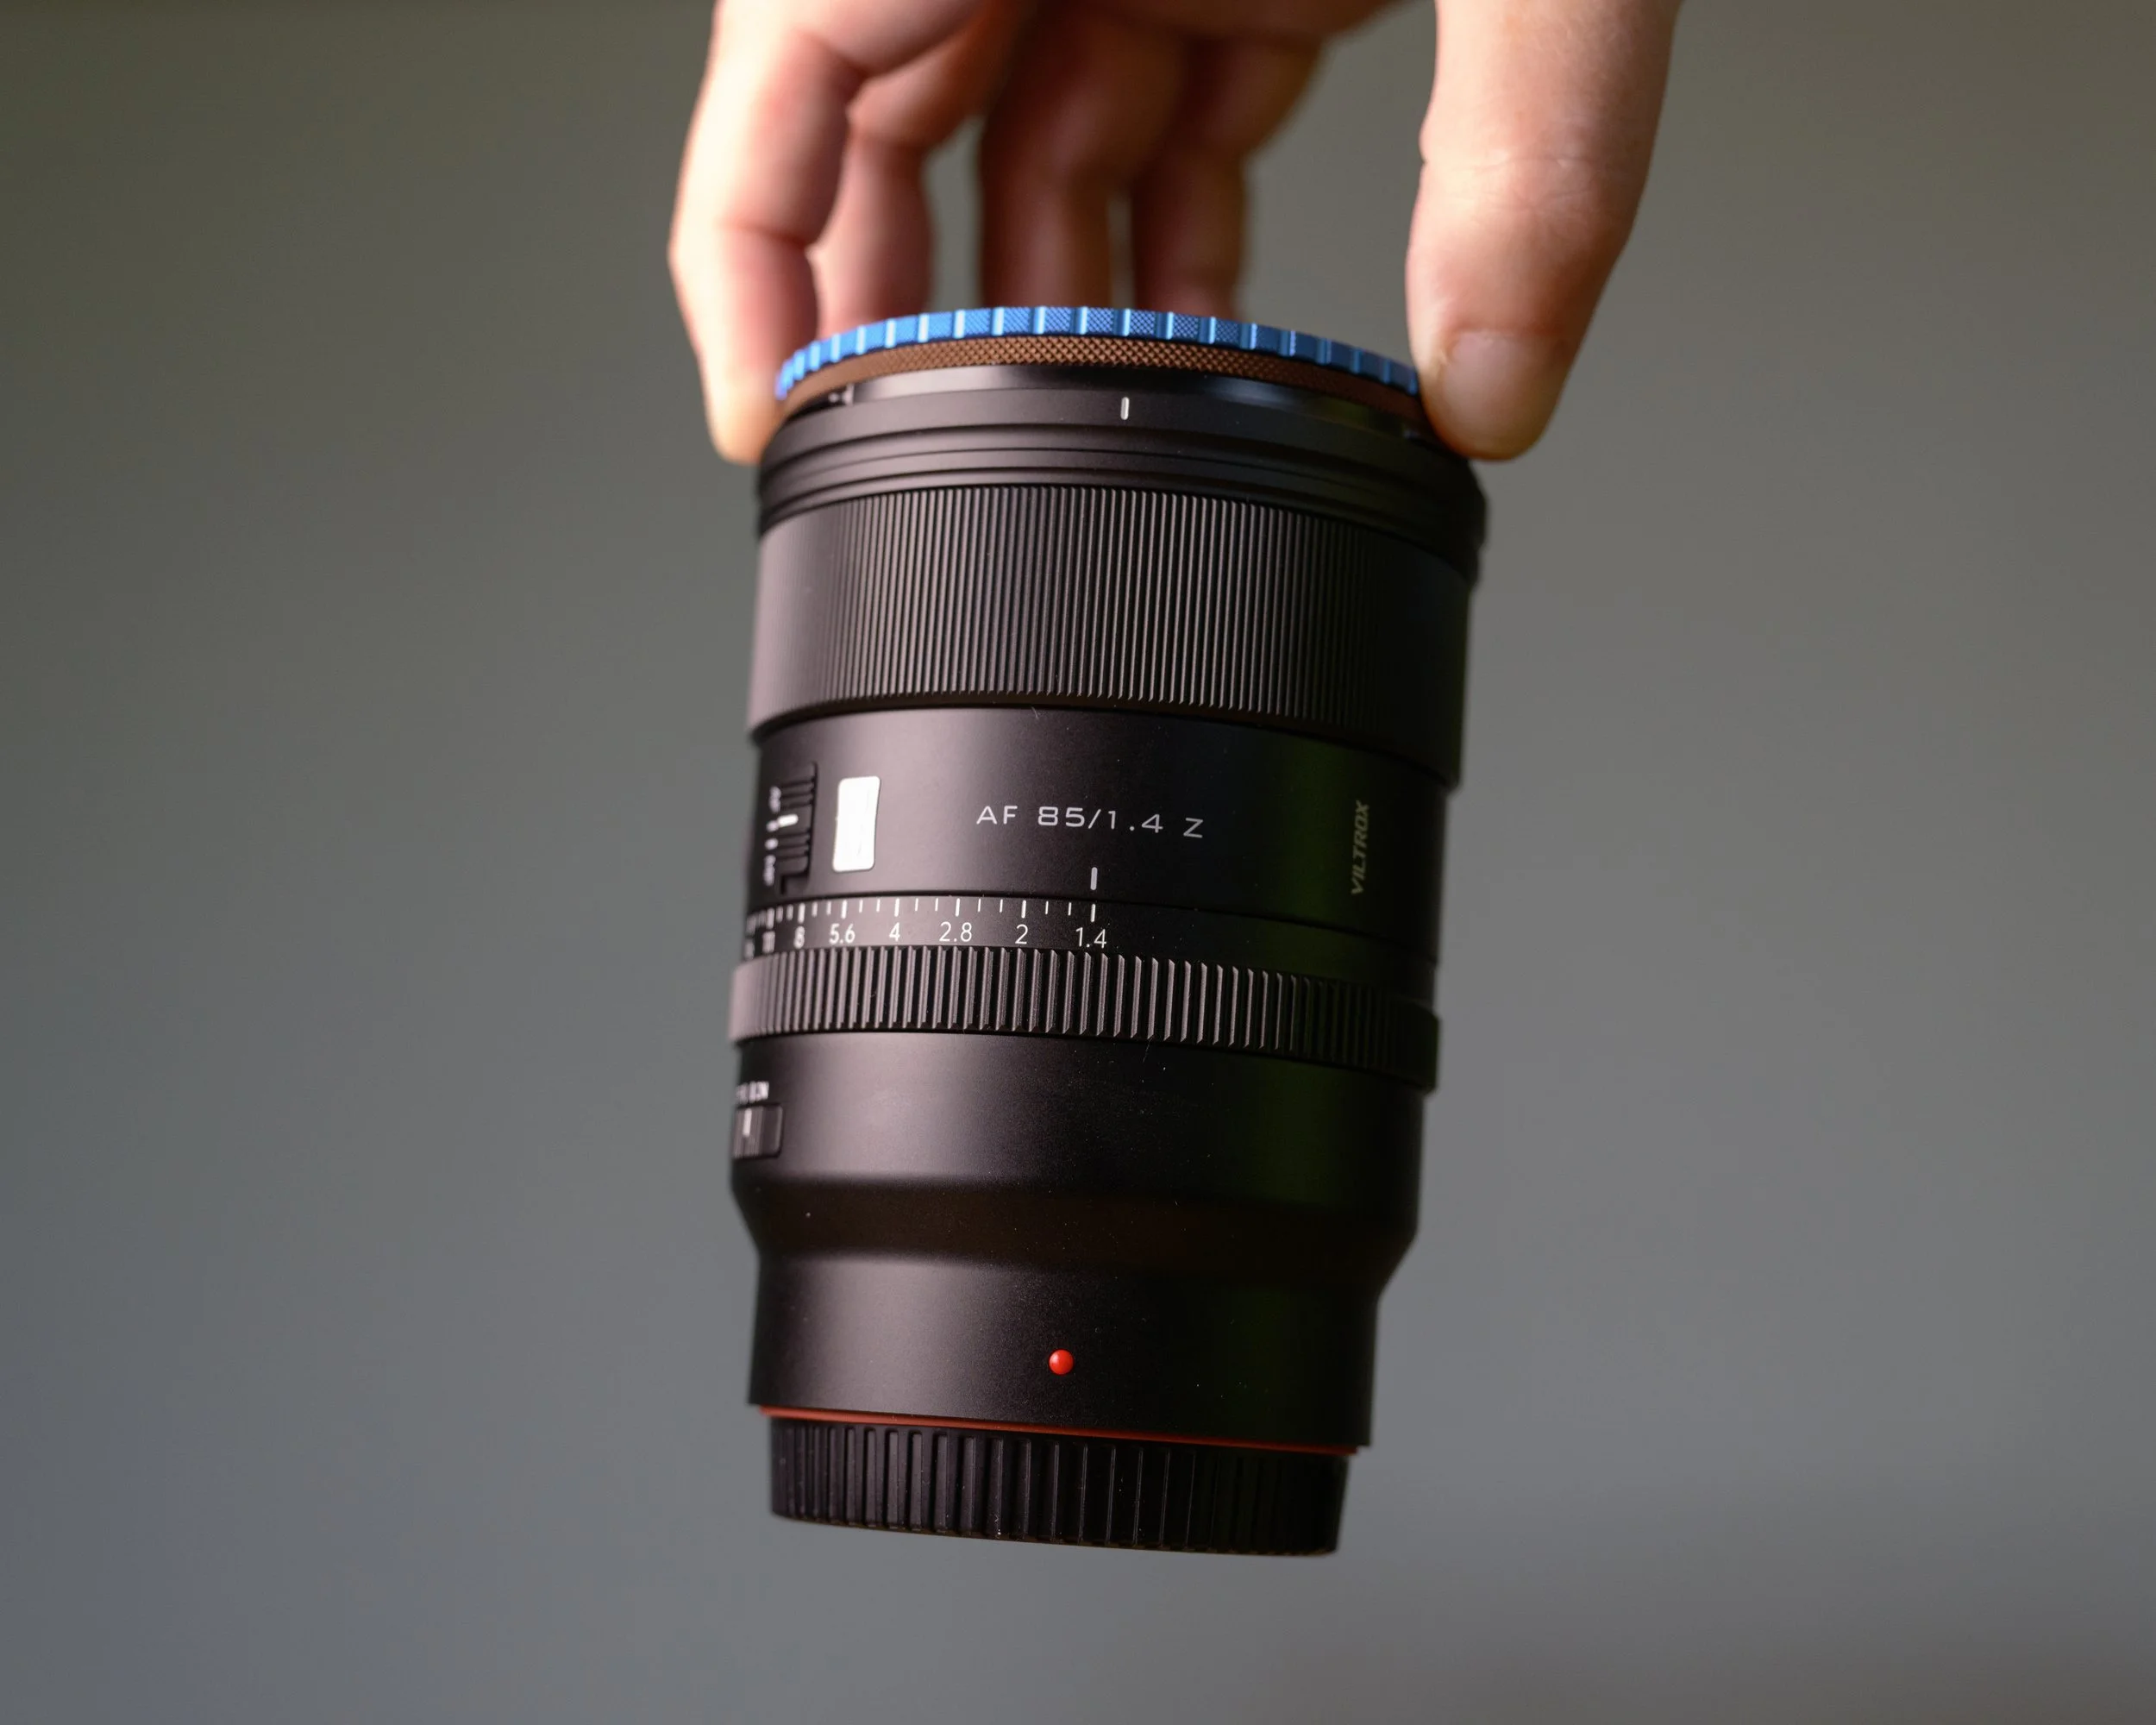
Really, truly…DON’T DO THIS!
This isn’t a particularly inexpensive kit, so I’m all about making small adjustments to protect the investment. Using an extra strength adapter should be your baseline, and you can keep the stock adapter around for emergencies.
Circular Polarizer (CPL)
This has been my most used filter type by far, helped by the fact that I bought an additional 52mm CPL alongside the provided 77mm CPL. On my smaller every day camera, this 52mm filter tends to live on lenses like the Voigtlander 40/1.2, Viltrox 26 EVO, and Viltrox 55 EVO, and the larger 77mm lens has been used primarily on my Z 24-120, Sirui 75/1.8 Anamorphic, Viltrox 85/1.4, Sirui 85/1.4, and Z 100-400. Due to it cutting around a stop of light, it actually allows me to use my fast glass like the Voigtlander with a more open aperture midday without needing an ND filter.
Anyone that knows me knows how deep I am into creating and using JPEG recipes (or more properly, Flexible Picture Controls) on my Nikon cameras. I had a conversation this summer with Mihai Serban about how to bring out more vivid colors in our Nikon recipes, and he suggested using a CPL. Not only am I getting richer, more pleasing JPEG shots than ever by adding the Maven CPL to my in-the-field workflow, I’m now creating recipes specifically for use with CPLs. An unexpected bit of inspiration from my new Maven filters!

Using a CPL is a great way to increase saturation and make your midday JPEG images more vivid
When it comes to video production, I have started using this CPL both indoors and outdoors for any scene that has any type of reflections. Not only does it reduce glare, it adds contrast and natural warmth straight into my footage. I don’t color grade my video, so the closer I can get to “correct” right out of the body, the better! Below is a comparison of the CPL off (left) and on (right).


Overall I have been extremely impressed with my two CPLs for everyday use. If there is a scene that won’t benefit from it, it’s off the lens in seconds. By purchasing the “full stack”, I can store it in my pocket or bag knowing it’s fully protected. That added piece of mind was worth splurging on the extra elements like the front and back caps.
Neutral Density (ND)
I will admit, I have always been a bit of a snob about the ND filters I have used. I settled on Breakthrough’s X4 line long ago and had not considered alternatives for many years. When you cheap out on ND glass, you can get all sorts of little nasties…areas of darkness in an X shape across the frame, color shifts, and largely unpredictable results. When my testing of Maven Filters began, they started behind the 8 ball with my inherant biases that Breakthrough had built over the years. I am happy to report that I am just as happy with Maven’s NDs as any I’ve ever used, and their added light weight frames and thin glass have been somewhat of a revelation. Where Breakthrough relies on heavy and thick brass housings, Maven’s aluminum construction buys you real weight savings on the go. Also, because the Breakthroughs were so heavy, I tended to overtighten them…just to be safe. That led to multiple incidents of getting them stuck on the lens in the field. Maven’s magnetic system completely turns the in-the-field experience on its head for the better. Not only are they extremely fast to mount and remove, they obviate the need for ever needing a filter wrench.
As I tested the NDs, I noticed that my Nikon would tend to meter warmer with the stronger filters, and auto exposure would also trend darker the more stops I used. Here are 4 examples normalized for white balance and exposure so that you can clearly see any color changes. The ND3 would white balance about 100K warmer than no filter, the ND6 about 400K warmer, and the ND10 about 550K warmer. In general, I would suggest hard setting your white balance when bouncing between NDs. I have made this a “worst case” test, allowing the ISO and shutter speeds to float (aperture priority), and the color shift you see at 10 stops is due to the much higher ISO. If you take care to use longer shutter speeds and keep your ISO low, you’ll see even less color shift.
Having the ability to quickly stack these various NDs also opens up some creative opportunities in fleeting moments. Here, a fishing boat had pulled up and was idling in place for about a minute. I combined the 6 stop and 10 stop NDs to allow for a 25 second exposure in the midday sun.

An effective 16 stop ND, 25 second shot with the boat registration number still legible…incredible!
Linear Polarizer (LPL)
I would say the LPL has been the least used of this kit for me, as I have been so pleased with the adjustable angle CPLs for simple still photography. The LPL, however, does have a bit of a trick up its sleeve by being able to be stacked with the CPL, creating a Variable ND filter in practice. First, you mount the CPL to the magnetic adapter, and then you stack the LPL onto it. By rotating the LPL and aligning its number markings to the CPL marking, you can control how many stops of light you are cutting between the two. Very cool for video work, which I used this combo for the most.
Front and Back Caps
There isn’t a tome to be written here. I highly recommend picking up back caps for each size filter you have so that you can create highly portable “stacks” that fully protect the filter. I have come to like the basic front cap over time compared to the Front Cap 2.0, mostly because it’s smaller, lighter, and lower profile. I love that the basic cap has felt on the filter side vs the smooth aluminum back of the Front Cap 2.0. However, I will note that the 2.0 has a MUCH stronger bond when mounted directly to the adapter ring or on a filter stack and is far less likely to come off unexpectedly. This is, of course, all a matter of personal preference.
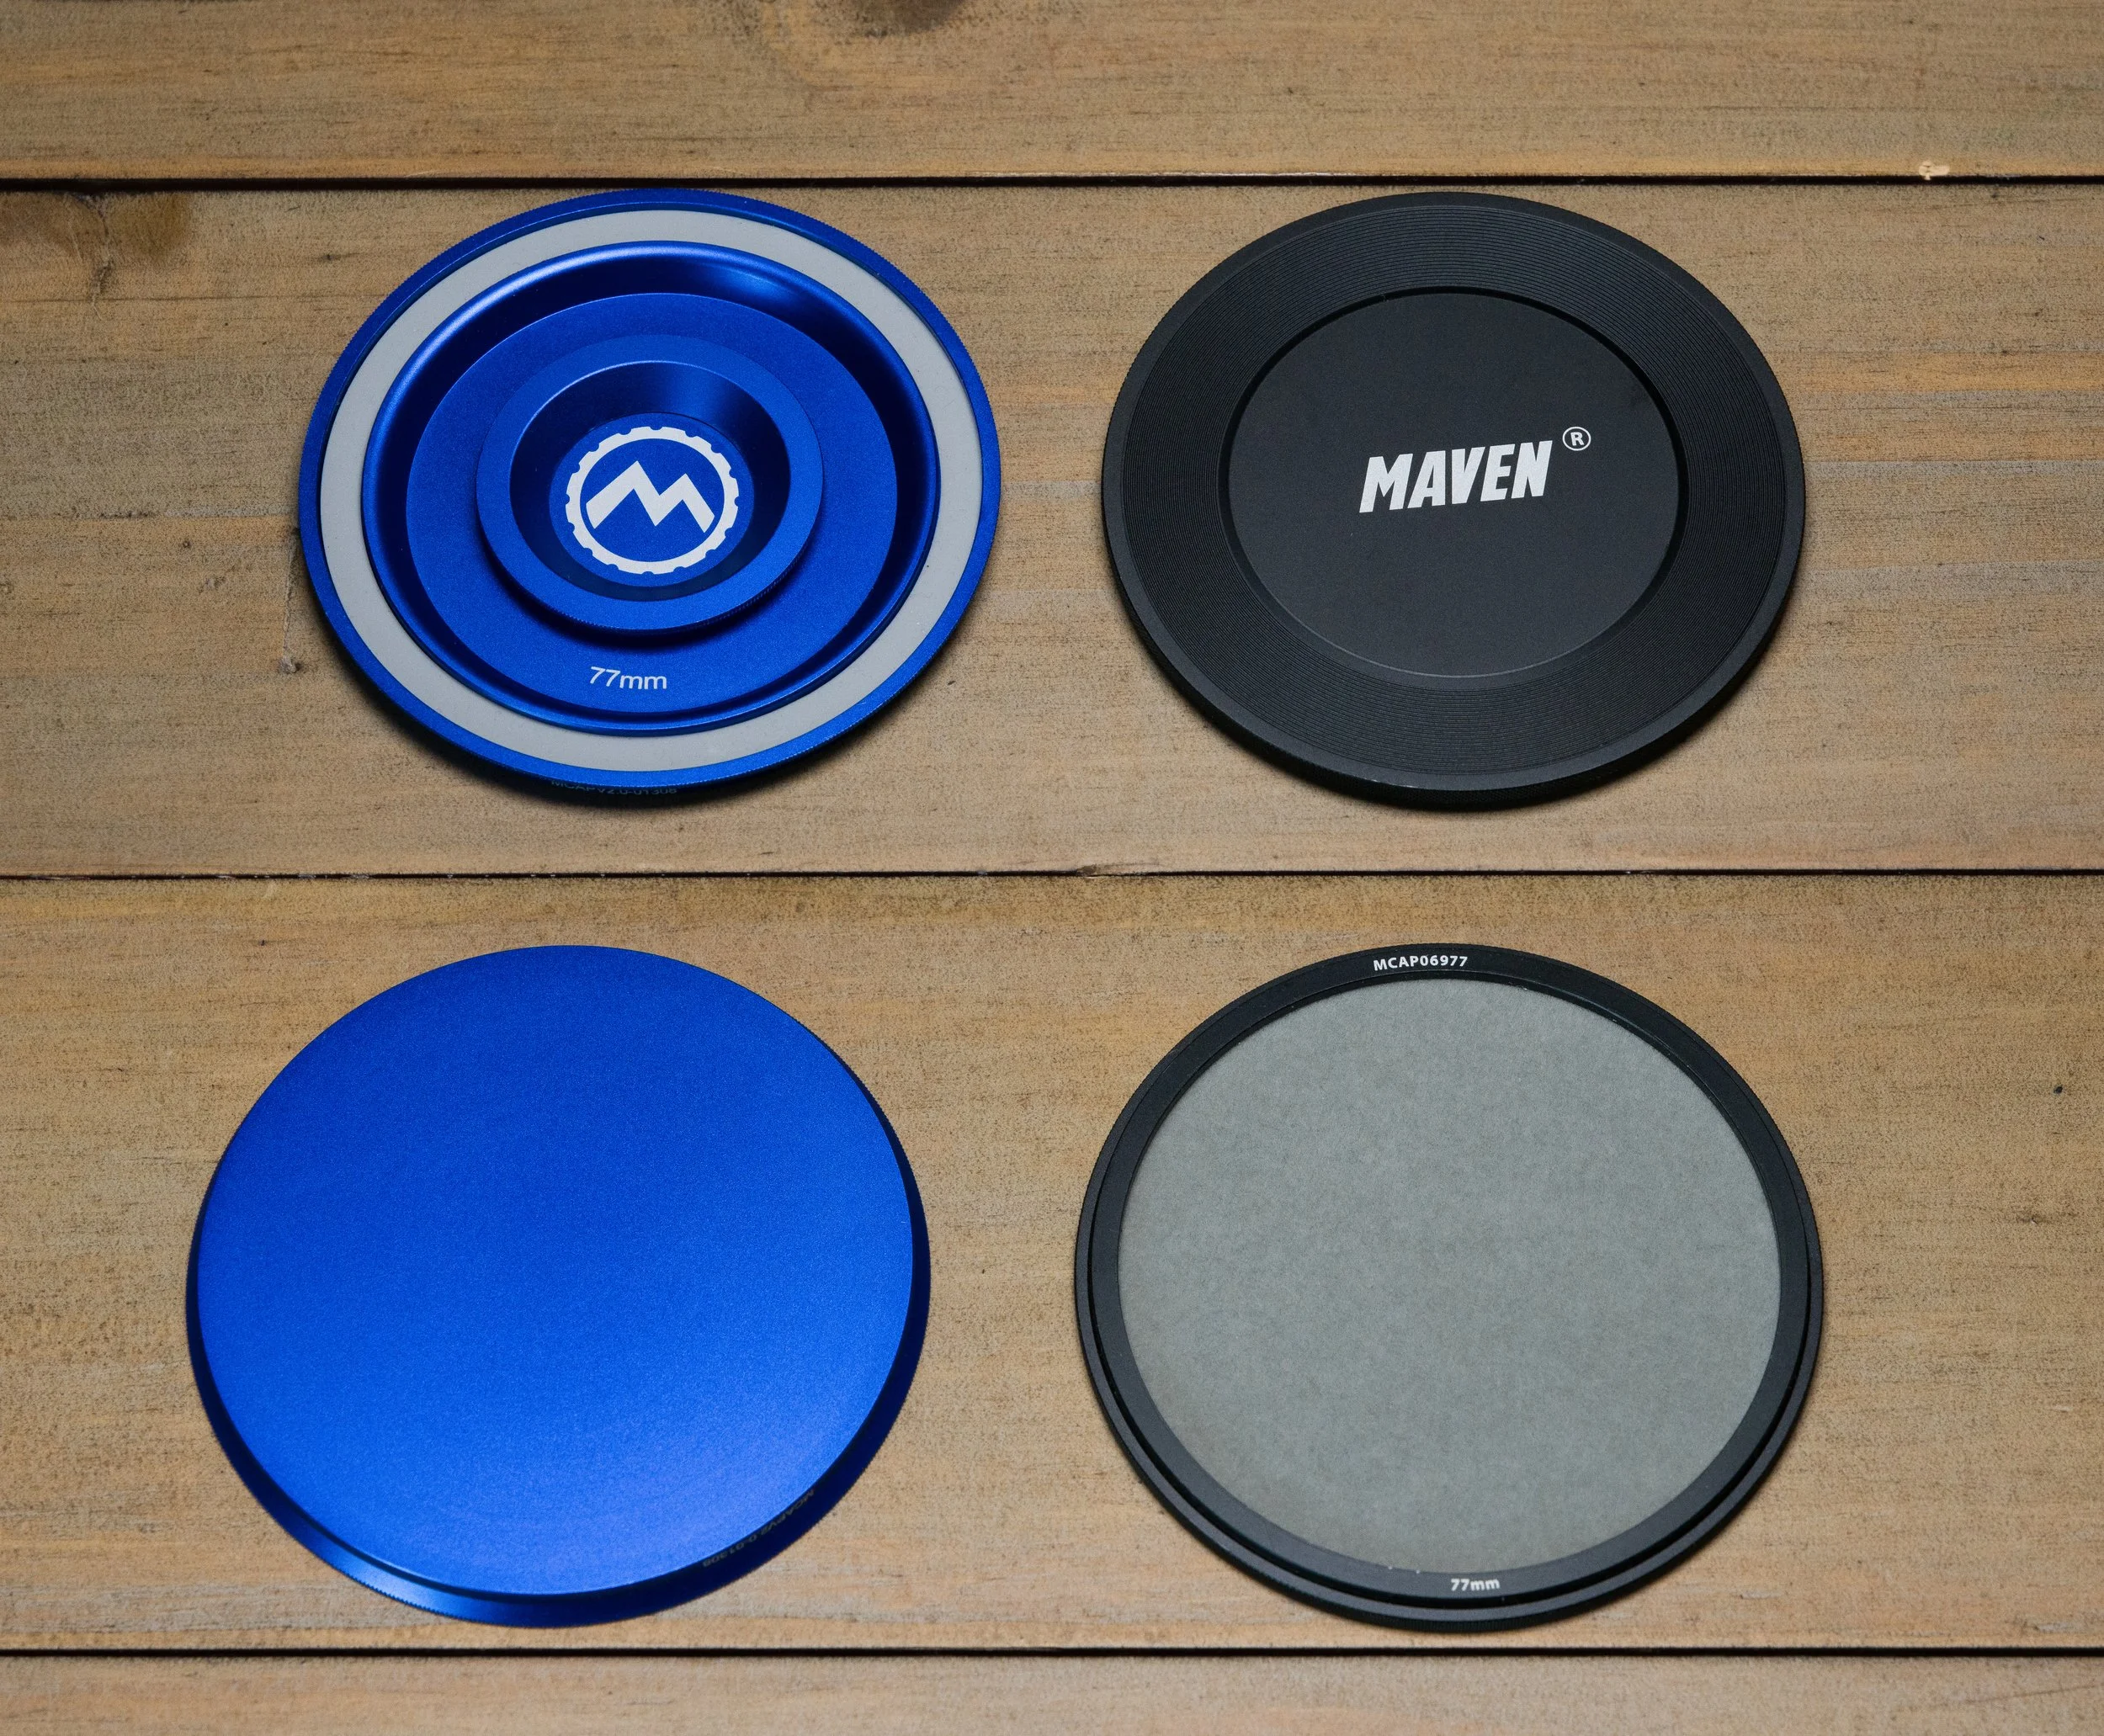
Front Cap 2.0 (left) and the standard included front cap (right)
It should be mentioned that the Front Cap 2.0 comes in multiple colors that match the various Maven offerings, so it would be possible to match the color of your cap to the function of your stack, matching your ND stack with a red cap, or your Polarizer stack with a blue cap as examples.
Splash Guard (UV)
It has been my advice to other photographers for years that the function of the UV filter should be reserved for extremely harsh shooting environments where you want to protect the front element of your lens…the blowing, sticky gypsum of White Sands, the beating salt spray of a Pacific Northwest beach, the constant dampness of English fog.
I’m happy to report that the Maven Splash Guard causes no visible color shift and my camera meters identically with or without it. For me personally, it’s all about pure utility: it’s there to provide protection and nothing else, and that’s exactly what is happening here. It’s always cheaper to replace a filter than the front element of your lens. Below is an example of the Splash Guard off (left) and on (right).


To have this filter included in the CPL/ND kit is a great addition and really fleshes out the utility of the system.
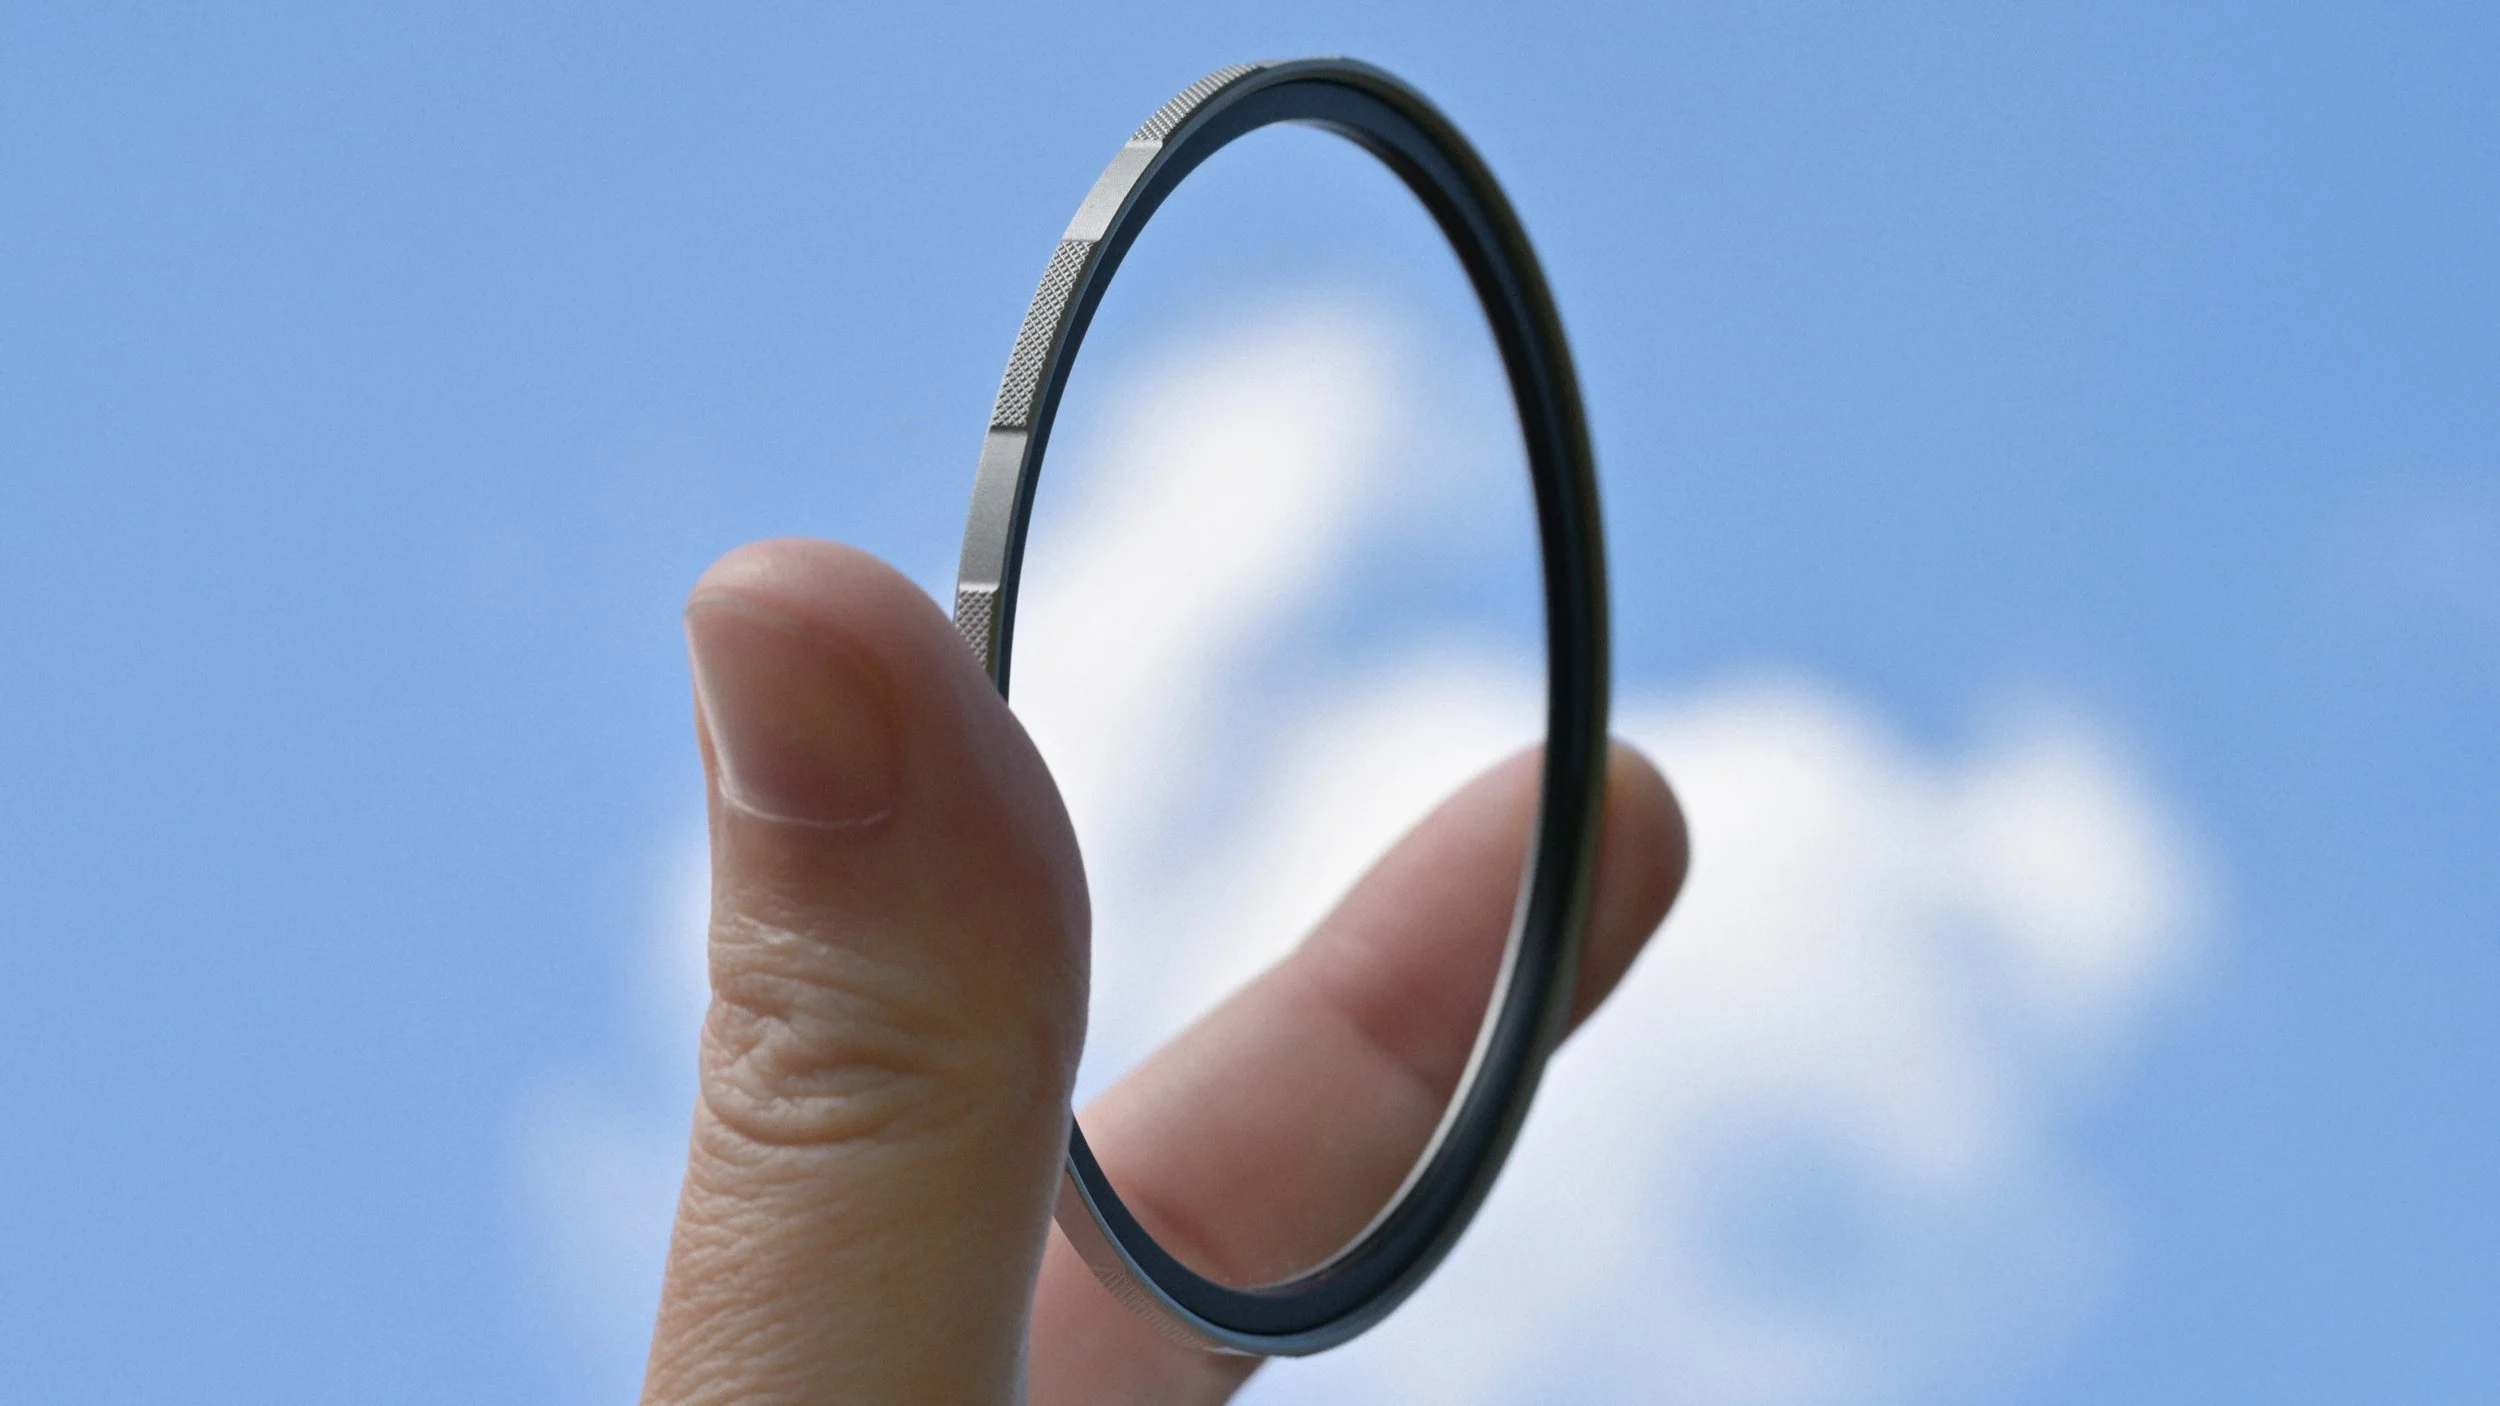
One little filter can save you big money when shooting in harsh conditions
Step Up Adapters
I have purchased 2 regular strength step up adapters as part of this review, and have reached a conclusion that is probably obvious by now: buy the extra strength option. Unfortunately, those were not released when I bought mine, but just like my experience with the regular strength adapter rings, I have had filters pop off these unexpectedly while traveling. It also appears that not every step up adapter has an extra strength option yet, but Michael tells me they are working on that.
Aside from the magnet strength of the regular version, they work as advertised and are a convenient way to utilize your existing filters with more lenses as appropriate.
Quick Case 2.0 Carrying Case
This is the part of my kit I get along with the least at this point. The construction feels flimsy with lots of play and flex between the two halves of the “Pac-Man” design even when closed. As near as I can tell, the retention mechanism on the clasp is simply pressure between two plastic elements. I get the gnawing feeling that the clasp will eventually break, though so far it has remained functional and intact.
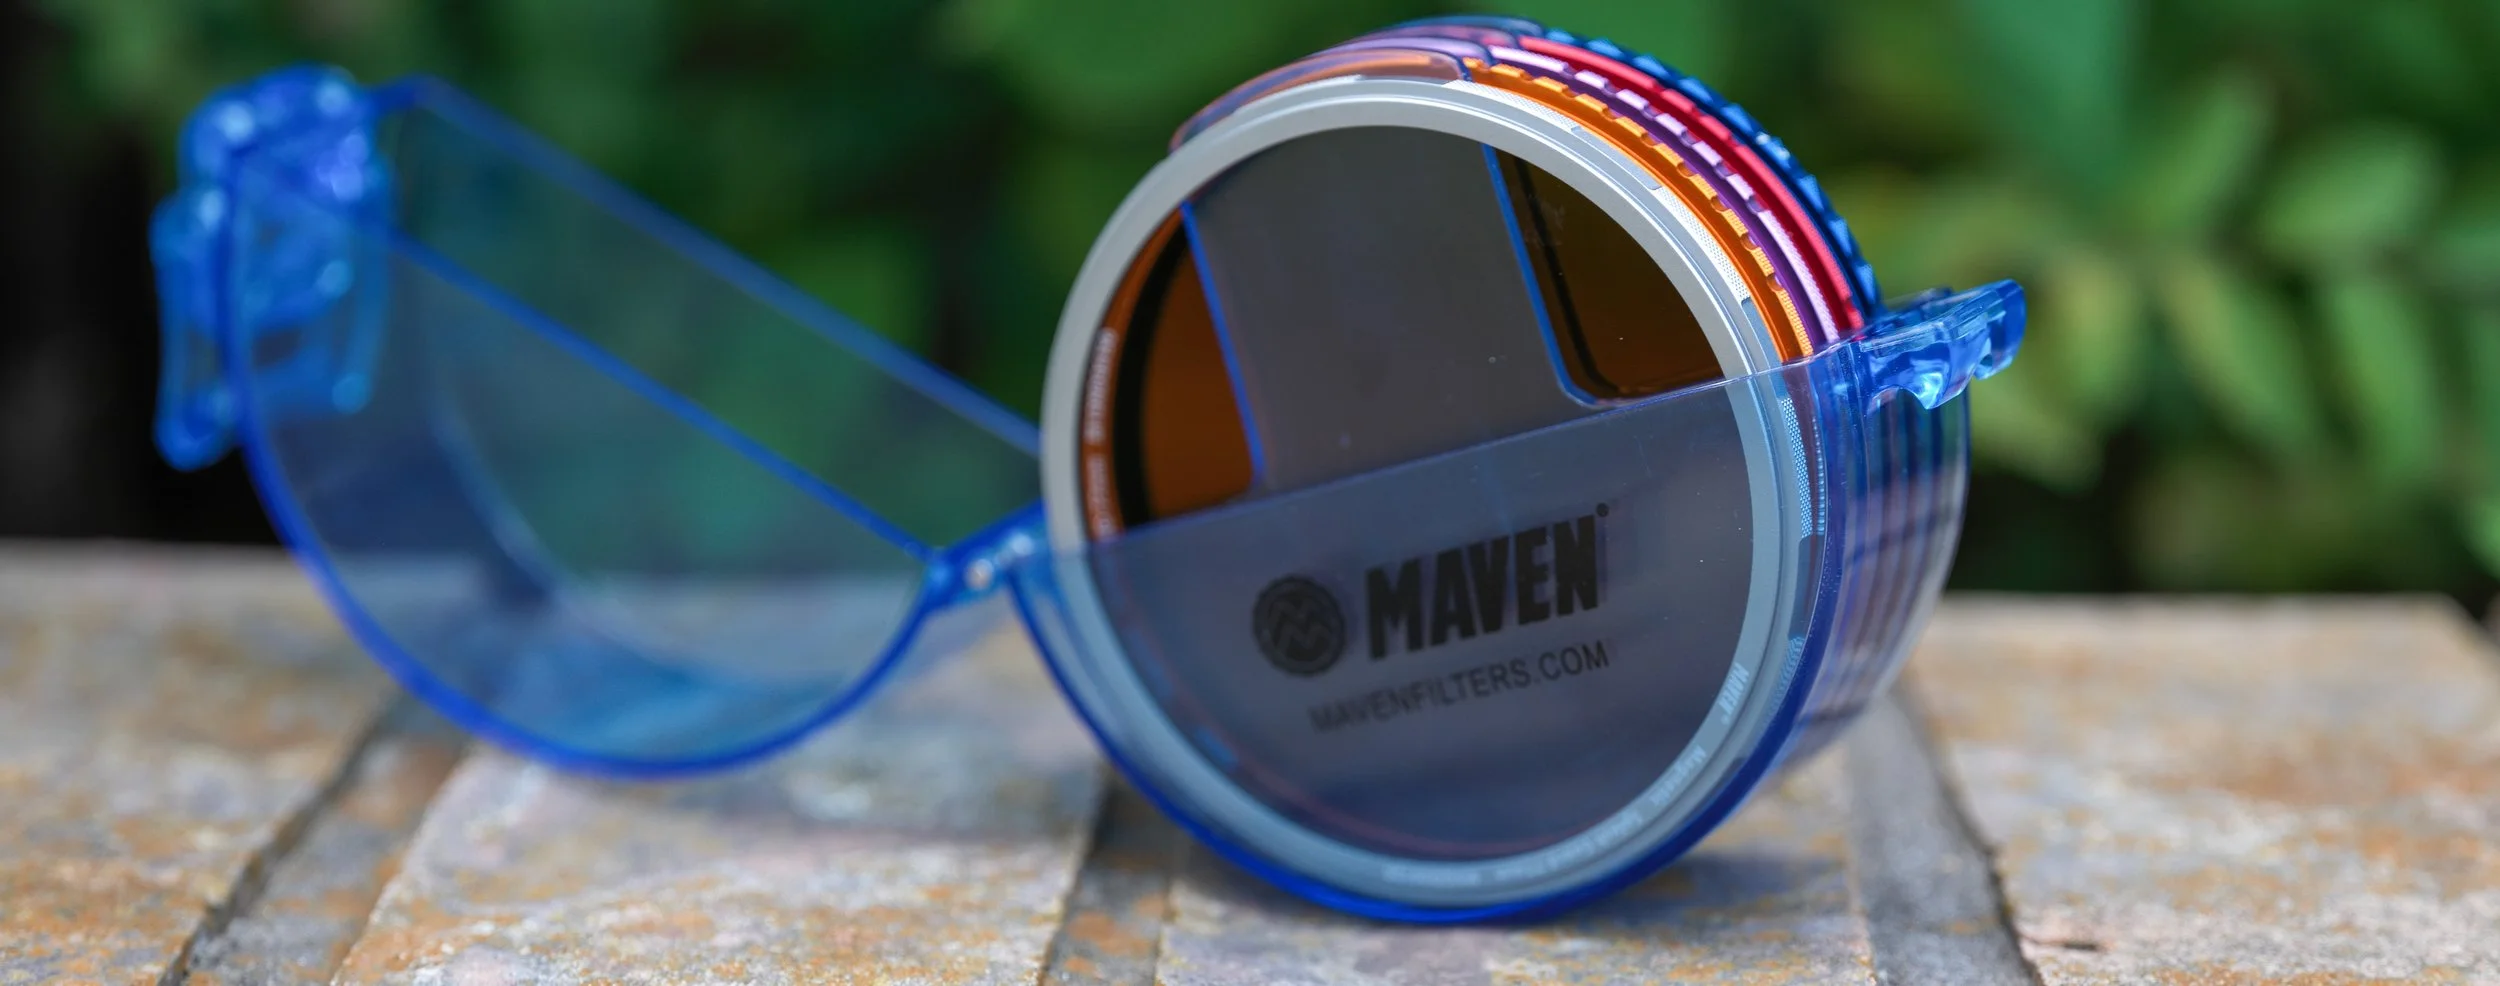
I understand the appeal of a plastic case, as it’s very easy to glance through it and make sure all filters are accounted for when packing for a shoot. Maven also offers what they call the R-Case which gives you a metal closure, but you can’t see the contents and it’s a soft-shelled design that only comes in limited sizes of 82mm and 95mm.
As it stands, the standard 5-filter Quick Case 2.0 is utilitarian at best. I’d love to see an upgraded option that has less flex, more metal in the construction, a higher grade of plastic, and a METAL clasp assembly. I’d also like to see it have room for 6 filters, so I don’t have to choose between adding my LPL into the case and leaving another filter behind, or taking an extra storage case.
Some General Thoughts
For everyday use, I’ve started transporting my filters by creating a stack that matches my activities for the day. A typical day of mixed video and photo work will usually consist of a 3 stop ND, CPL, and front and back caps. I build this at home before leaving and have a tightly-bound unit that takes less space in my bag than the Quick Case 2.0. It should be said, however, that you can add many filters into a stack and retain a strong magnetic bond that keeps the entire stack secure during transport. The longer I have used this kit, the more I have come to appreciate the color-coding-by-function element of these filters. It makes grabbing the right filter the first time a breeze…no more digging through samey-looking black filters and squinting at tiny text printed along the filter frame. So nice!
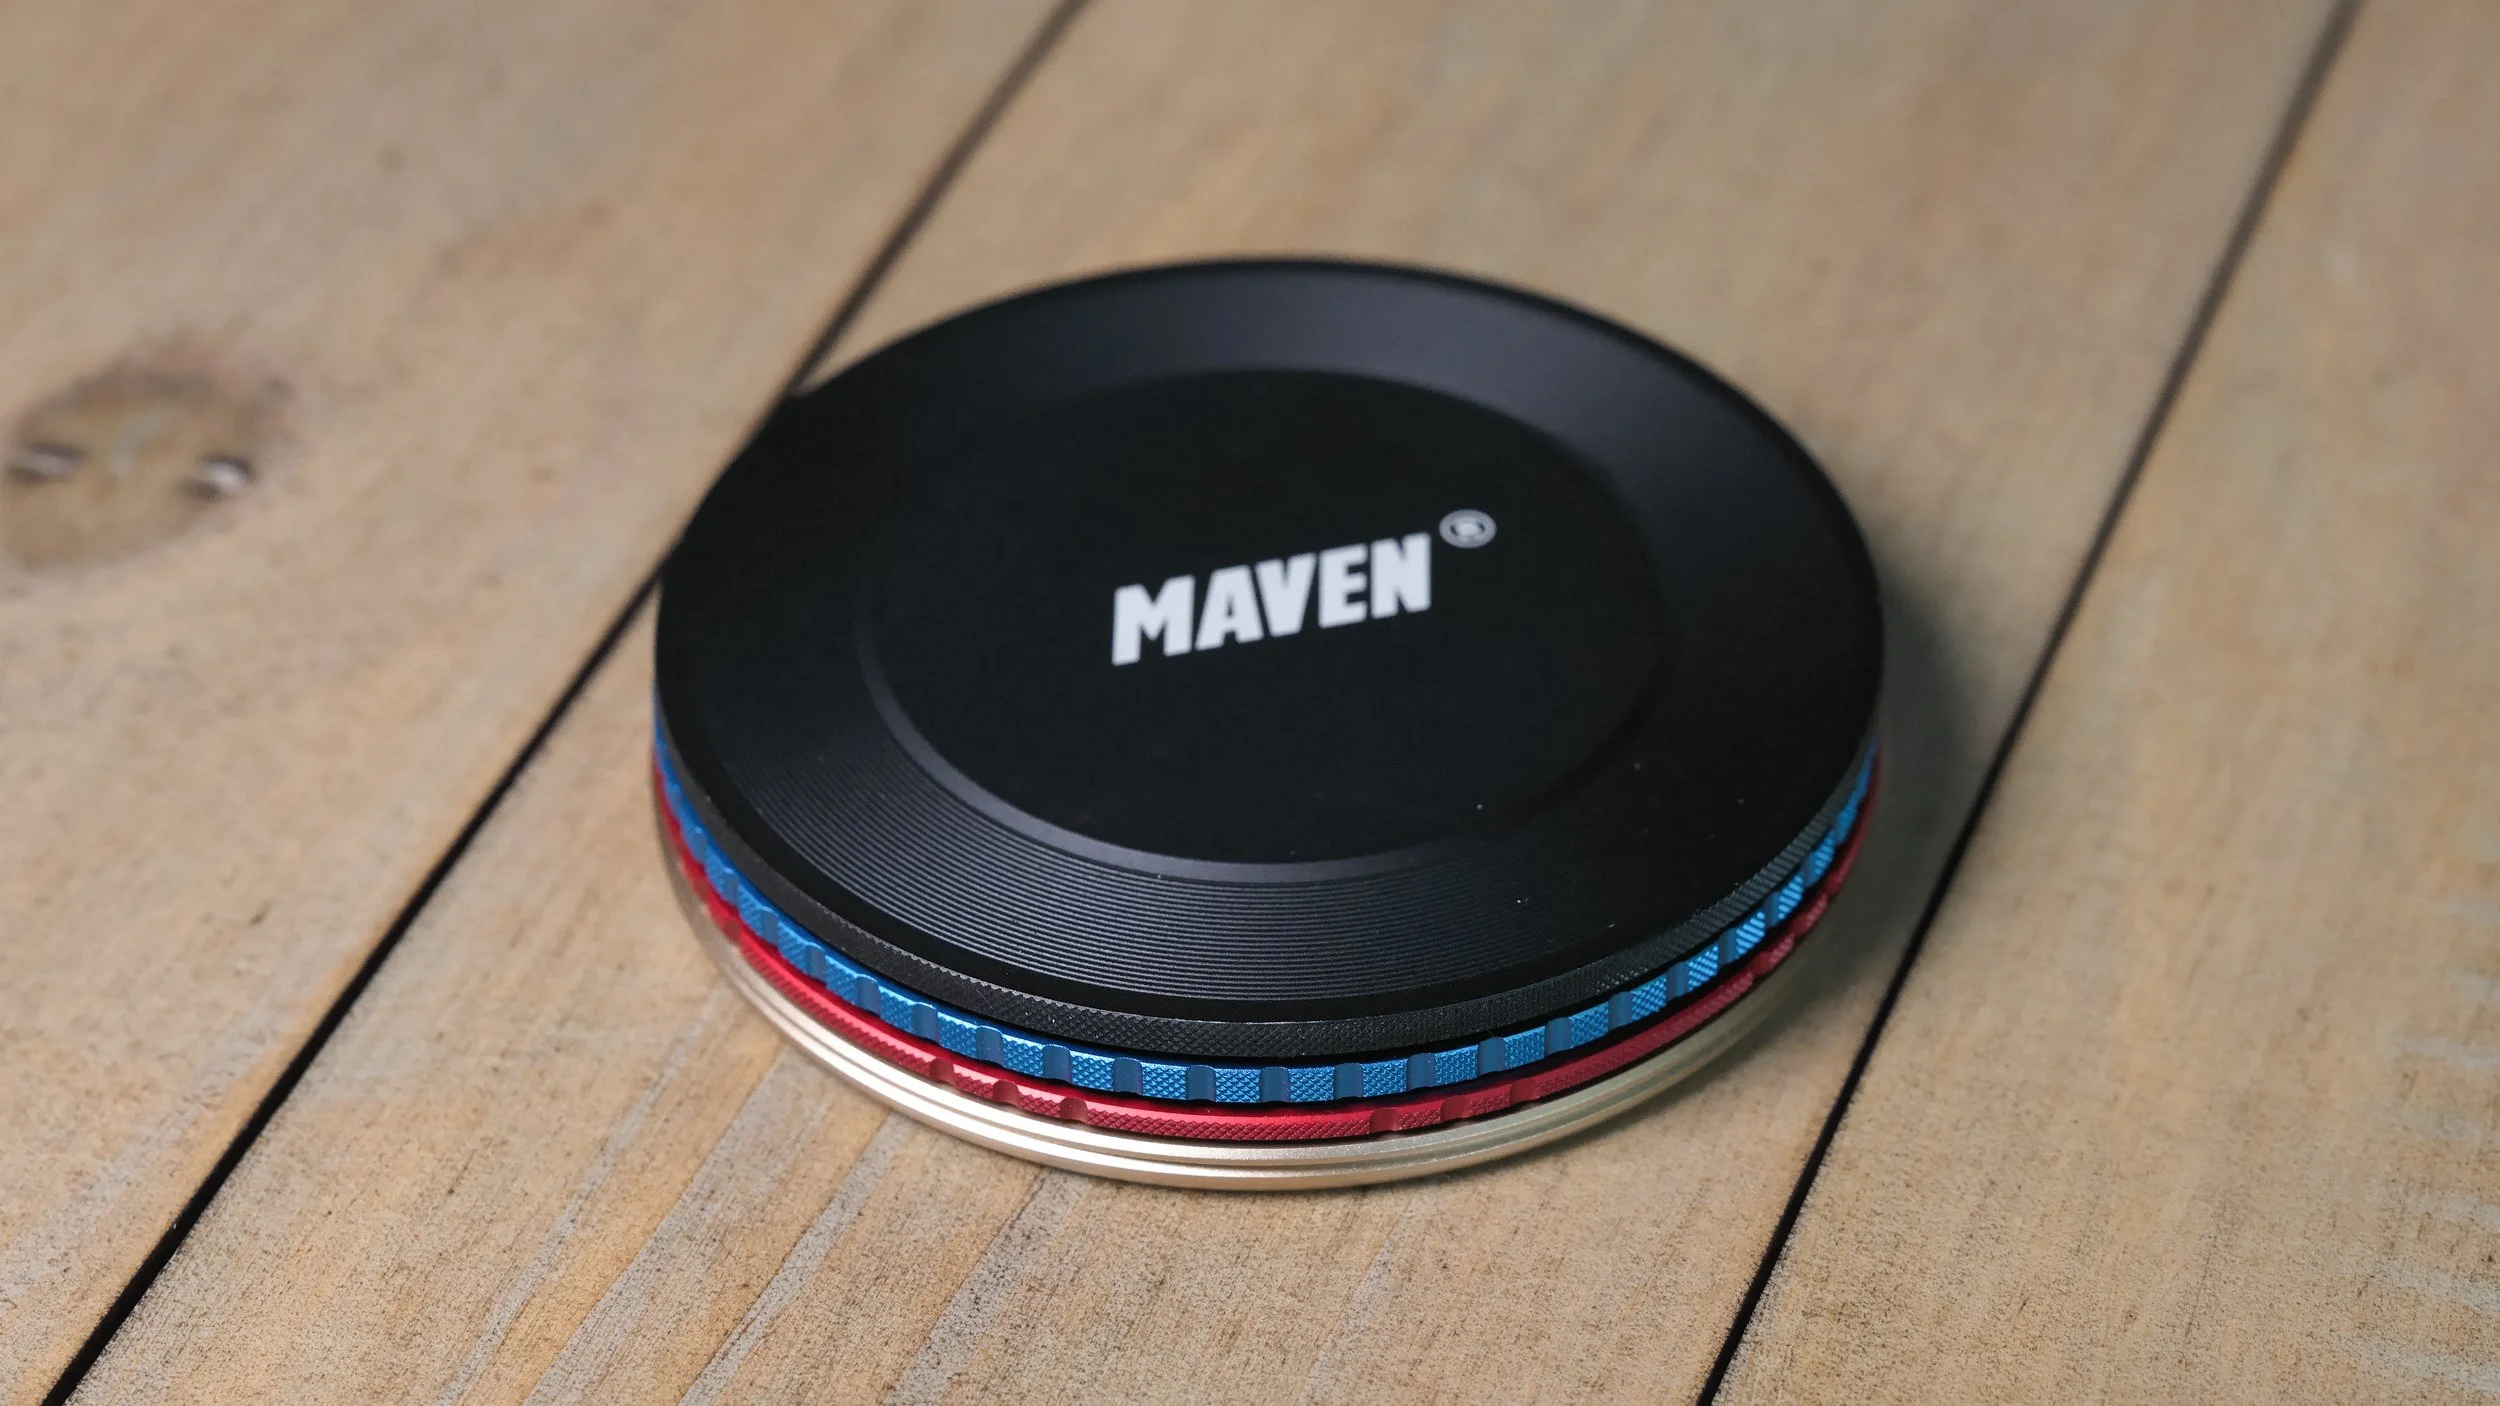
My 52mm “everyday” Maven stack with back/front caps, 3 stop ND, and CPL
There is a use case that I have personally found extremely niche, but I’m still happy to have the option. Let’s say you have a classic threaded filter that you enjoy and that Maven doesn’t quite make an analog to - well, simply screw that filter to your lens, and put the Maven Magnetic Adapter on the filter itself. My personal setup in this fashion is having a favorite diffusion filter at the back of the stack and having the maven setup attach directly to it.
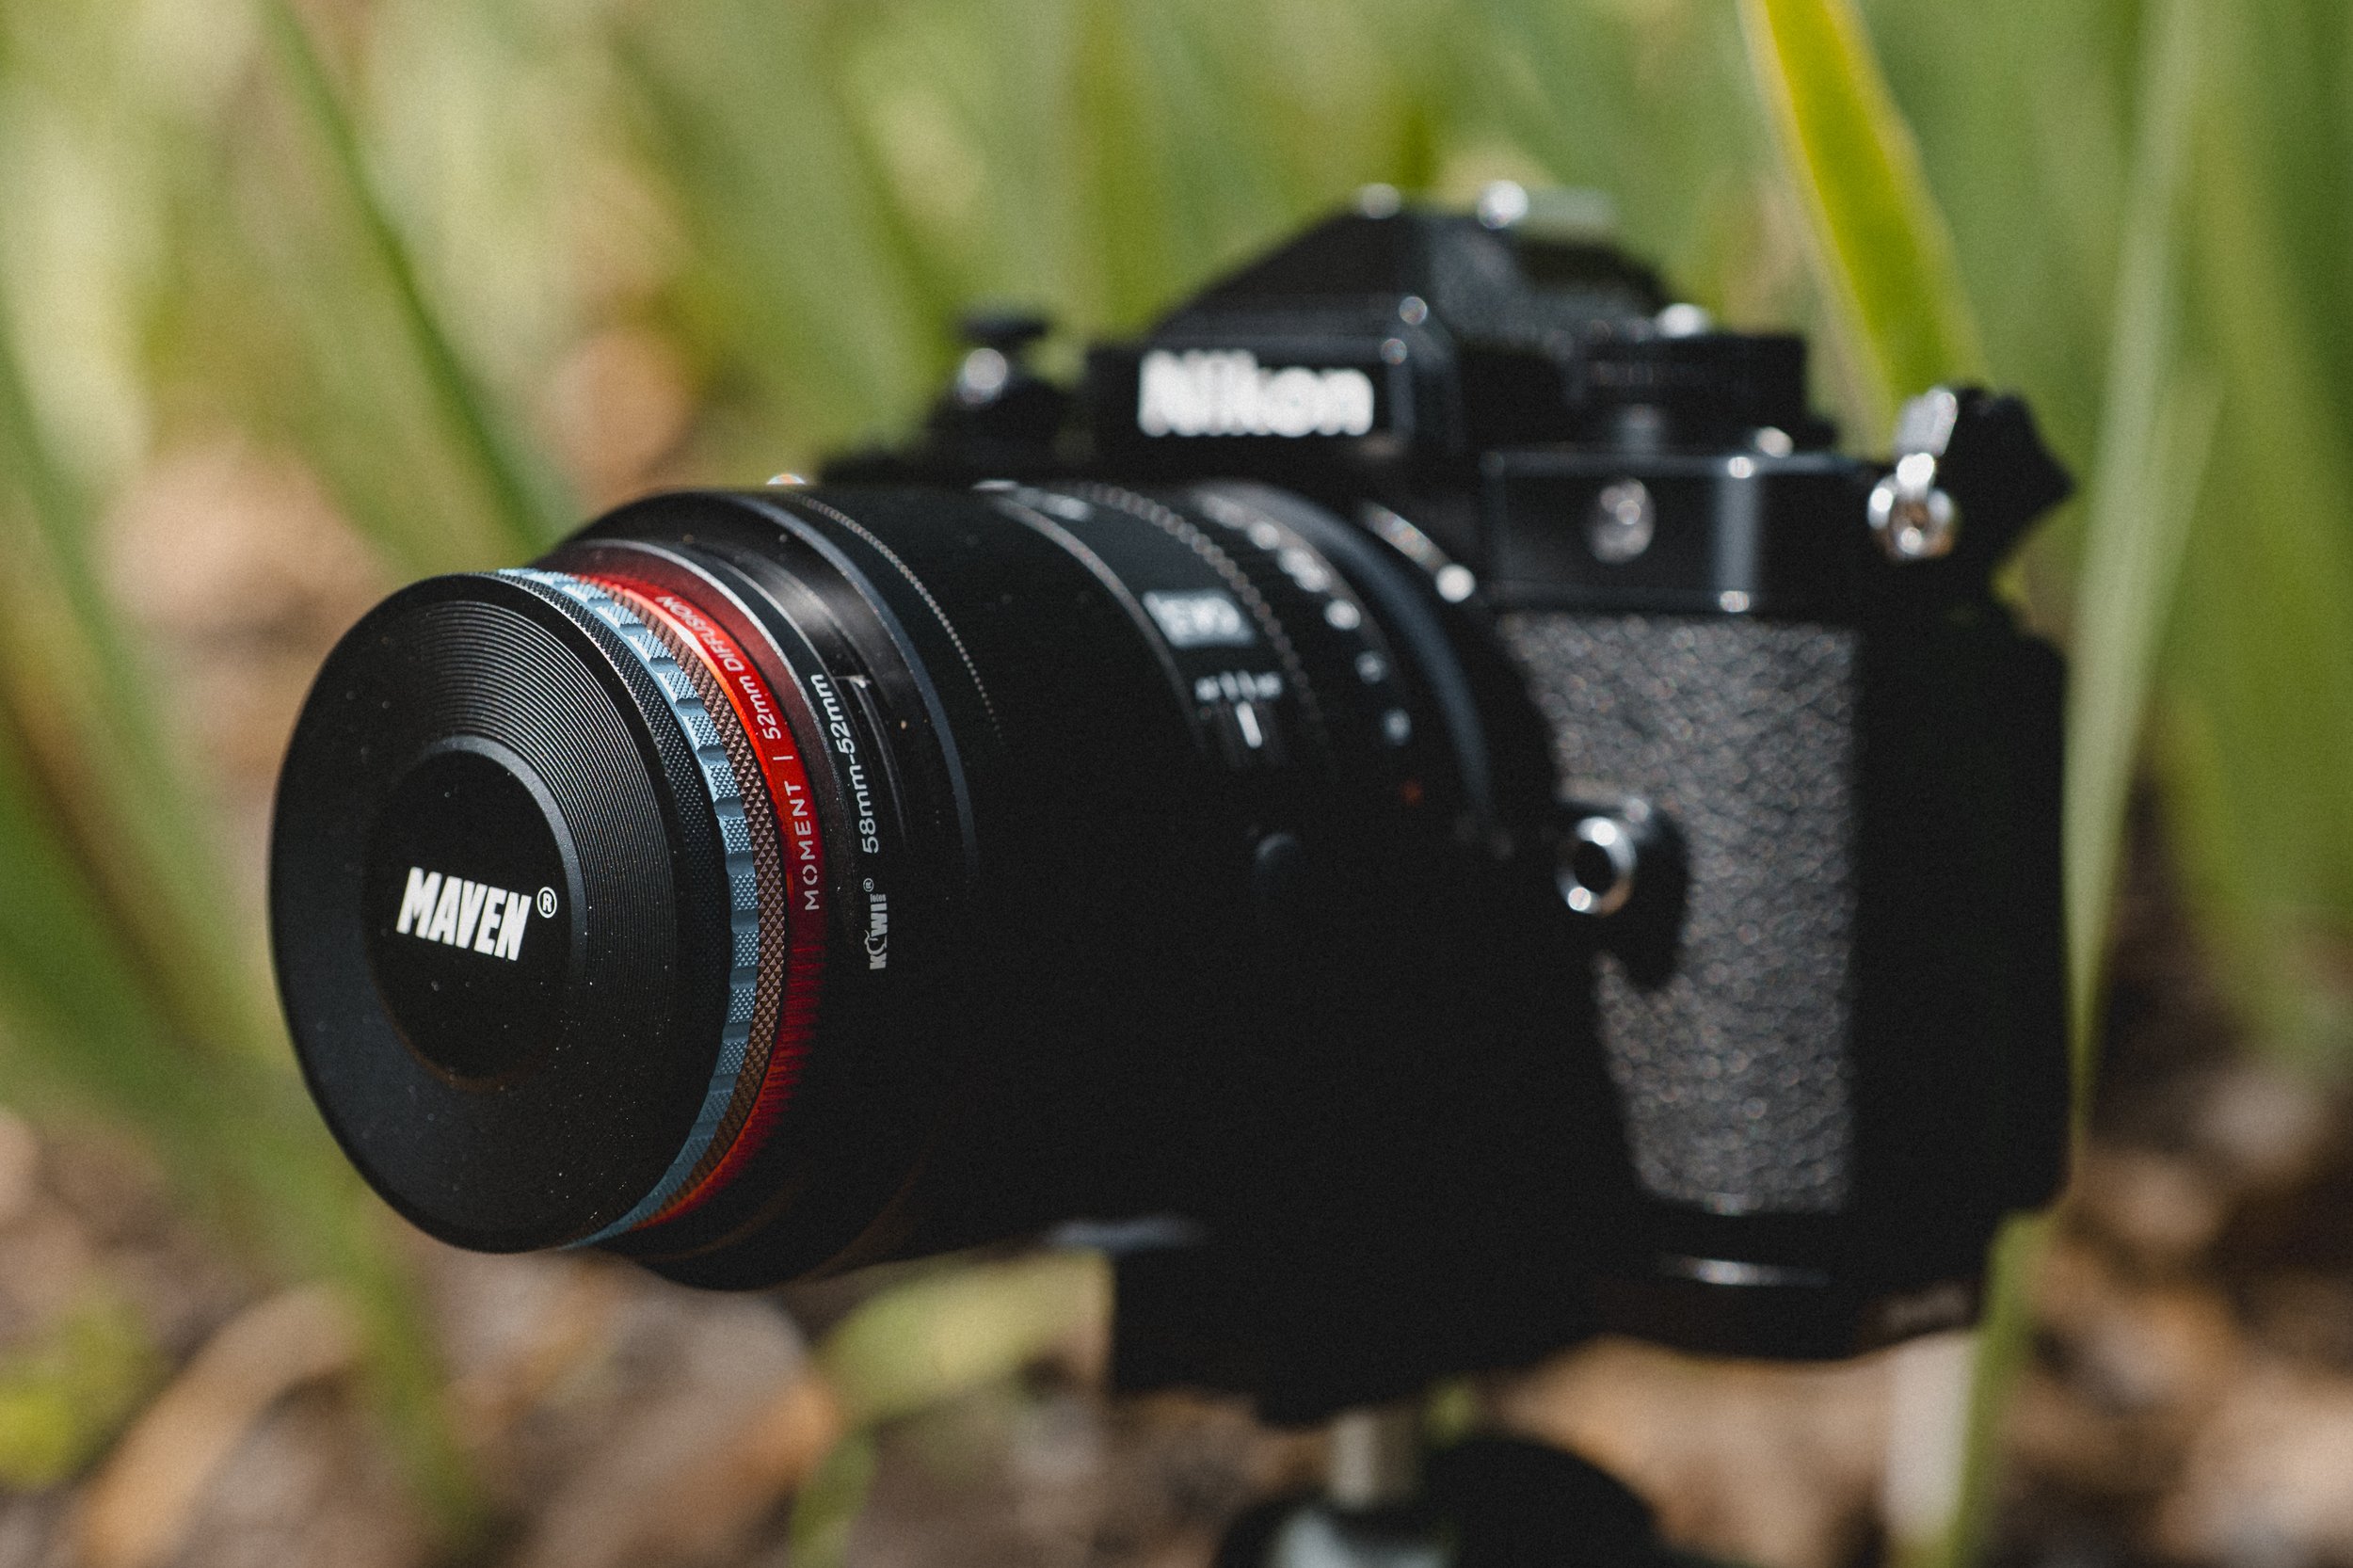
My Frankenstein’s Monster setup for a specific Viltrox lens featuring a threaded step down ring, third party diffusion filter, and Maven stack ahead of them
Even more fringe than my cobbled threaded-to-Maven setup is using Maven filters on a lens that already has some magnetic elements present. I bought a 43mm>52mm regular strength step up ring (extra strength not available in this size) to use my 52mm CPL on the recently released Viltrox 26mm f2.8 EVO pancake. This lens has a bit of a unique hood situation, having a bayonet style hood that is also weakly magnetized to the body. The filter threads on this lens are in the magnetic hood itself. I noticed that the filter attaches to the step-up adapter more weakly when mounted on this lens than it does when off the lens. I can only assume that we have a bit of a “magnetic conflict” at play at here, with the hood becoming detrimental to the Maven elements. I have seen a few more lenses releasing soon touting magnetic hoods, though I’m not sure if their filter thread situations will be the same as the Viltrox. Either way, something to simply be aware of.
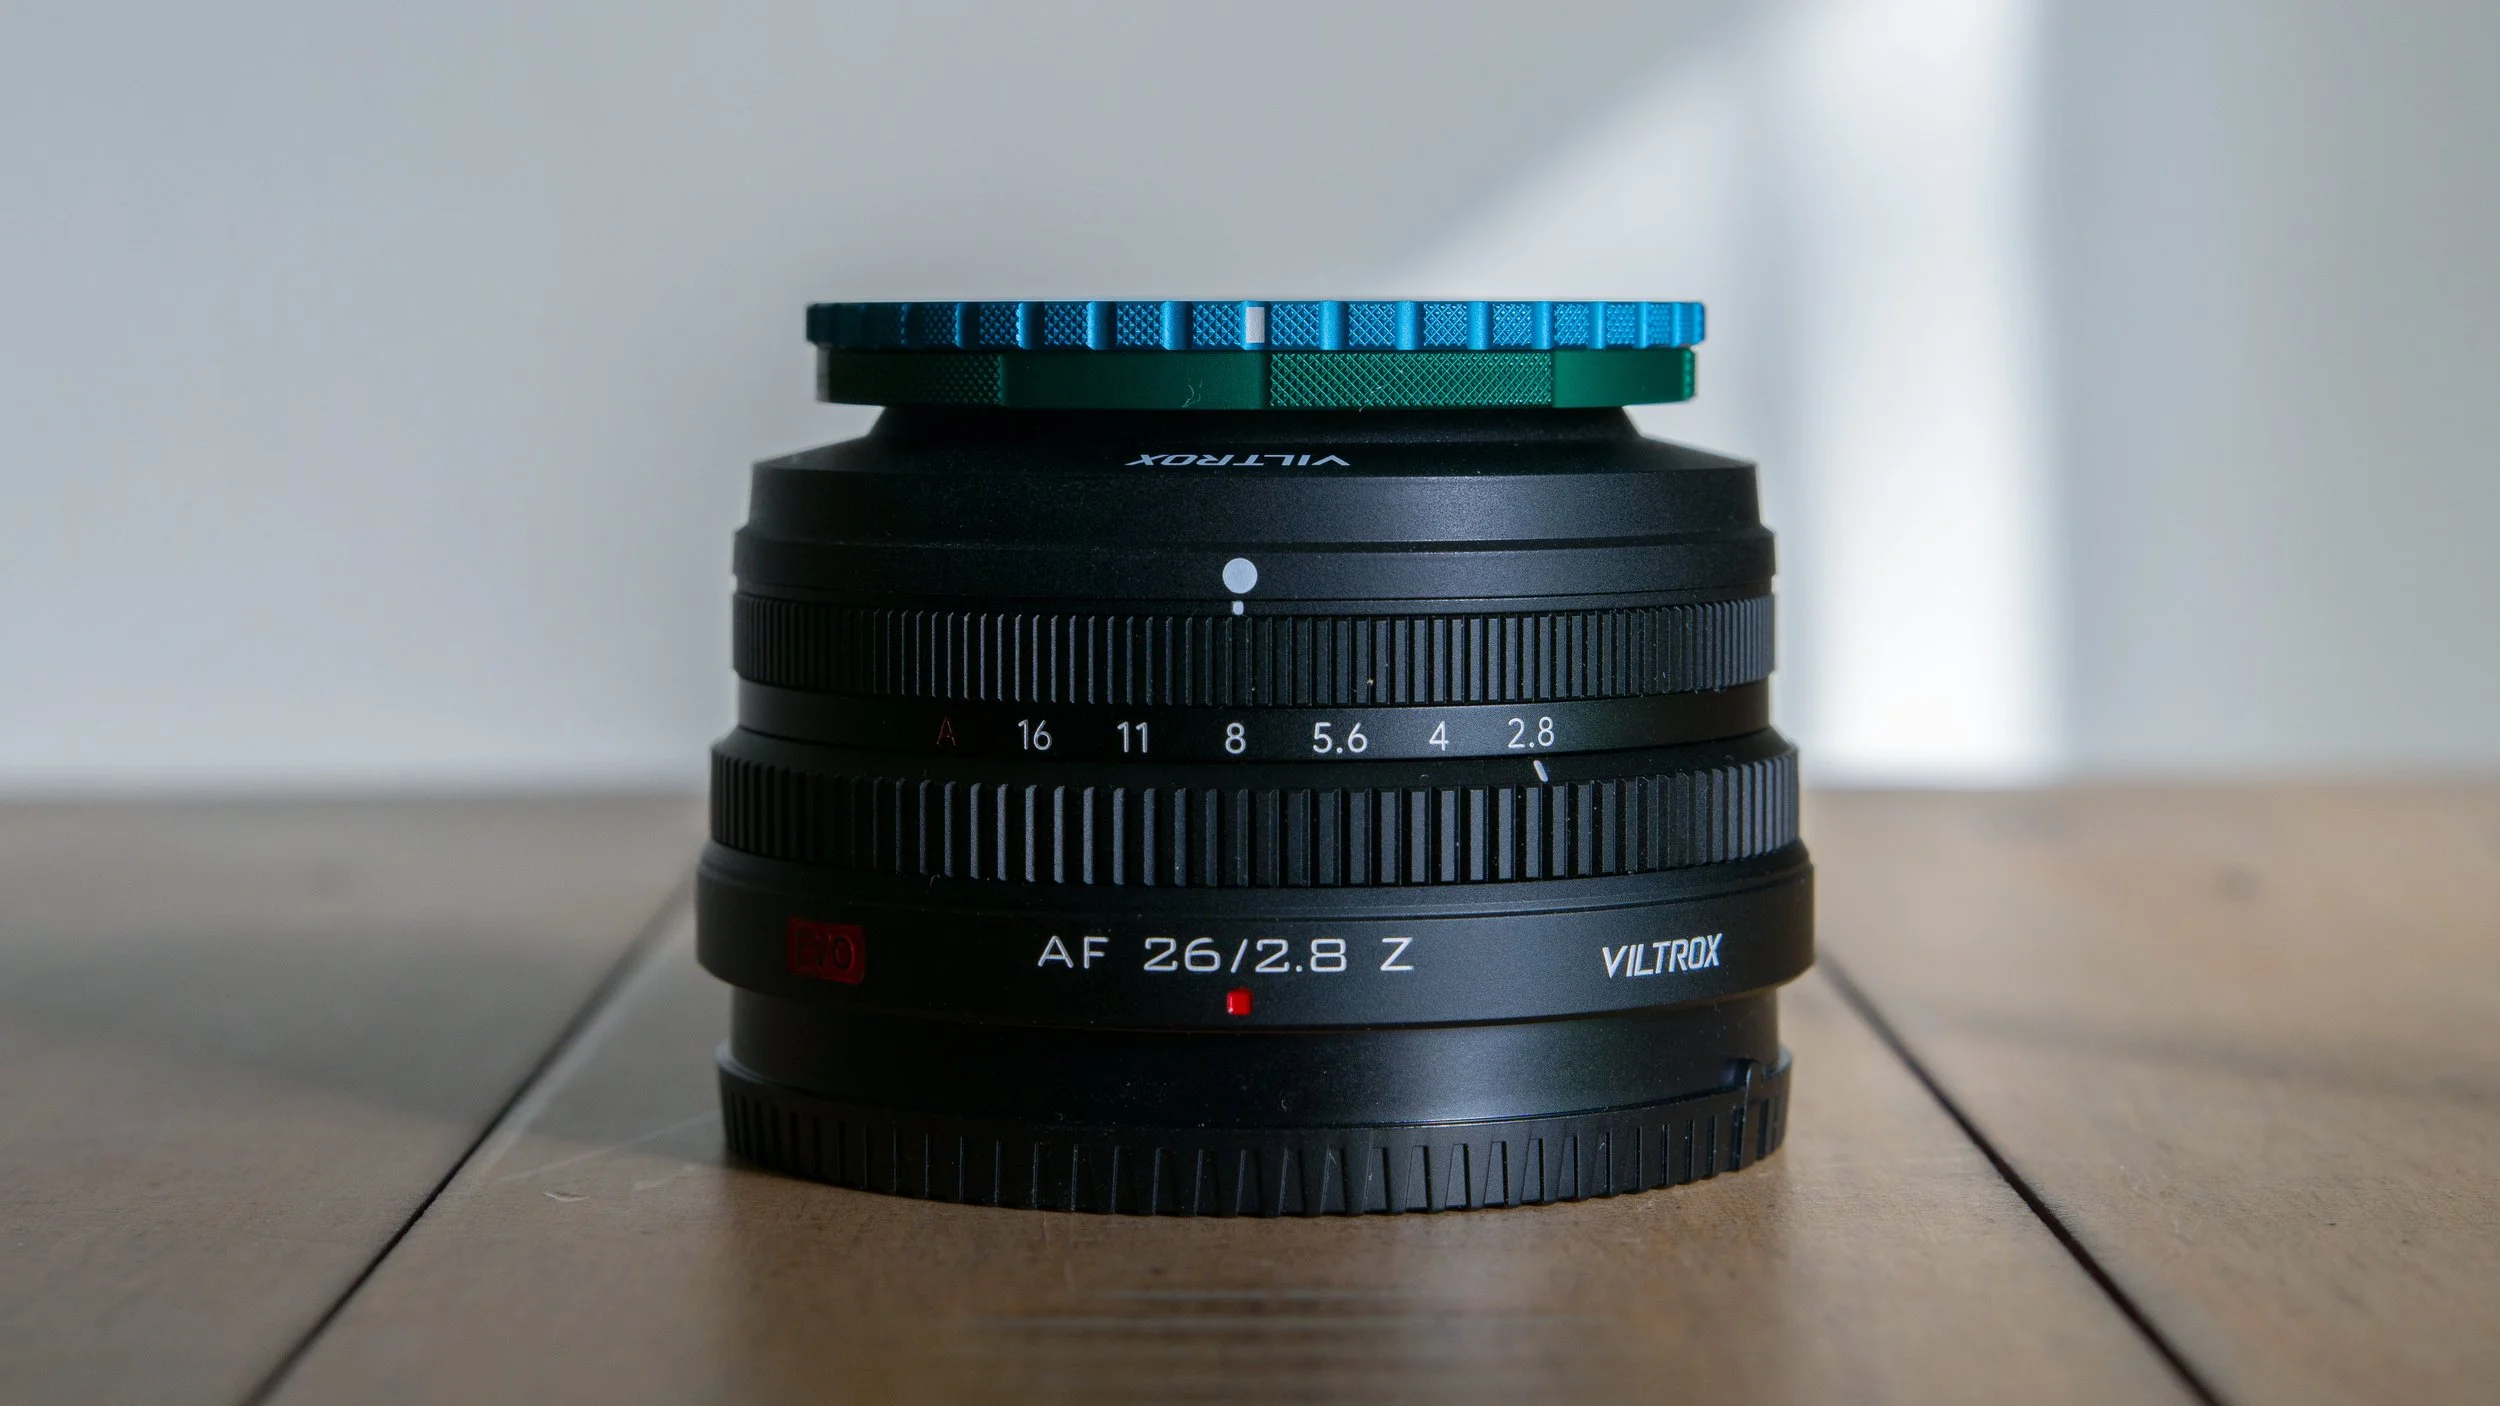
Combining a regular strength Maven step up adapter with the already magnetized Viltrox 26 EVO leads to a less-than-desirable outcome
Conclusion
Anyone who shoots midday scenes, especially landscapes, or folks who want to have the ability to do longer exposures in brighter conditions need to invest in some type of filter system. I use the word system as the key point here, because the more you standardize, the less you have to think about things in the field. If your lenses have a magnetic filter adapter permanently attached to them, then you don’t have extra prep work before heading out to shoot. If you have a case full of hot swappable, color-sorted filters in your bag, you don’t have to scrounge up multiple cases of disparate glass for every eventuality.
That’s the appeal of the Maven Filters system for me. It provides all of the benefits of a great filter with none of the grief, all within a unified adapter and cap system.
Of course, that does come at a bit of a premium compared to buying threaded filters by themselves. I am firmly in the “buy once, cry once” camp, and having invested my money into this system alongside my review set, I can say that Maven’s products are worth the extra squeeze and I will be investing further.
I appreciate all of the conversations I’ve had with Michael this year; he has been extremely gracious with his time, helping me understand his motivations behind the company and products. His passion for filters as a solution instead of as simple accessories is obvious and refreshing.
Lastly, one of the neat parts about the Maven system is that there is still so much more out there to explore now that I’m in the ecosystem…ghost prisms, Dark CPLs (ND and Polarization in one filter), diffusion, LPL diffusion, H-Alpha, streak, diopter and more…all waiting to be thrown on that trusty extra strength adapter that’s now on all of my favorite lenses. In a world increasingly filled with the glaring delusions of AI, it’s never been easier to get some truly creative work straight out of camera, and Maven is at the forefront of that movement.
Below is a gallery of images I have taken during my time with Maven Filters this year and you can click any image to view it full size. These photos contain a mix of all filters covered in this review. My reviews and sample galleries are living beings, growing over time as more samples are captured…check back later for updated examples!
Click here to shop for Maven Filters
As always, I appreciate you reading my reviews. If you found this helpful, please consider buying me a coffee with the button below so I can fuel up and bring you more content like this.
-Scott